This article is about interfacing R307 Fingerprint Module with Arduino. We will enroll different person’s fingerprints. Later we will match the fingerprint and display the name of the person belongs the finger.
Fingerprint processing includes two parts: fingerprint enrollment and fingerprint matching. When enrolling, user needs to enter the finger two times. The system will process the two-time finger images, generate a template of the finger based on processing results and store the template. When matching, user enters the finger through optical sensor and system will generate a template of the finger and compare it with templates of the finger library. System will search the finger library for the matching
finger. System will return the matching result, success or failure
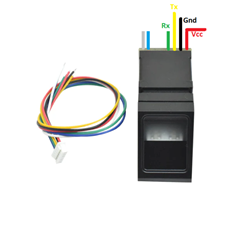
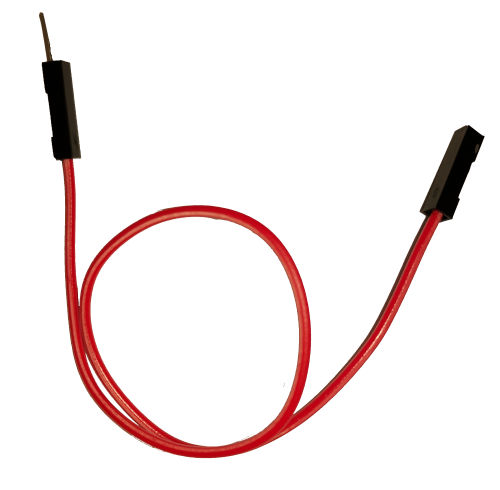
Wires of Fingerprint Module
Components need for this Project


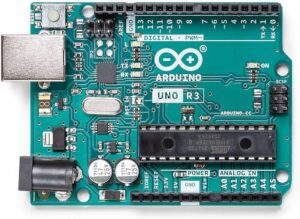
- Arduino Uno ➜ 1 pc
- R307 Fingerprint Module ➜ 1pc
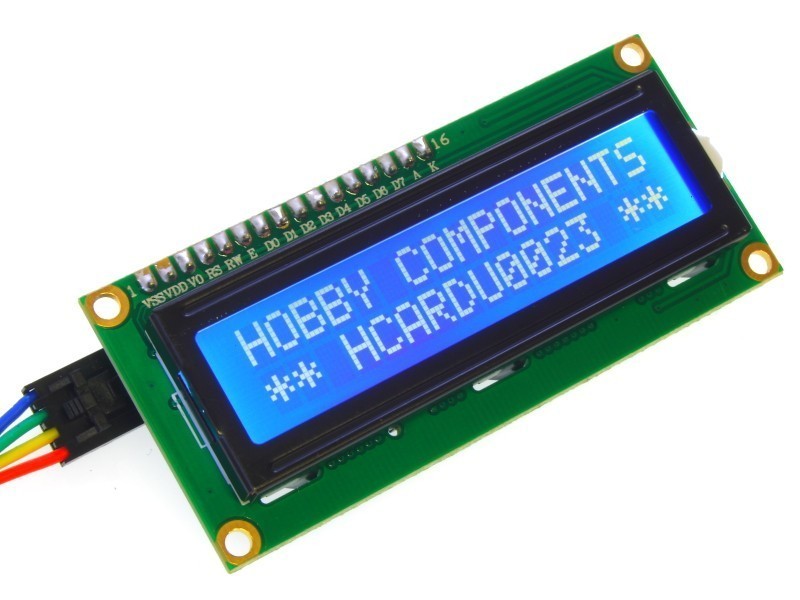
- LCD1602 with I2C ➜ 1 pc
- Breadboard ➜ 1 pc
- Male-Male Jumper Wires ➜ 6 pcs
- Male-Female Jumper Wires ➜ 4 pc
Hook up with Arduino
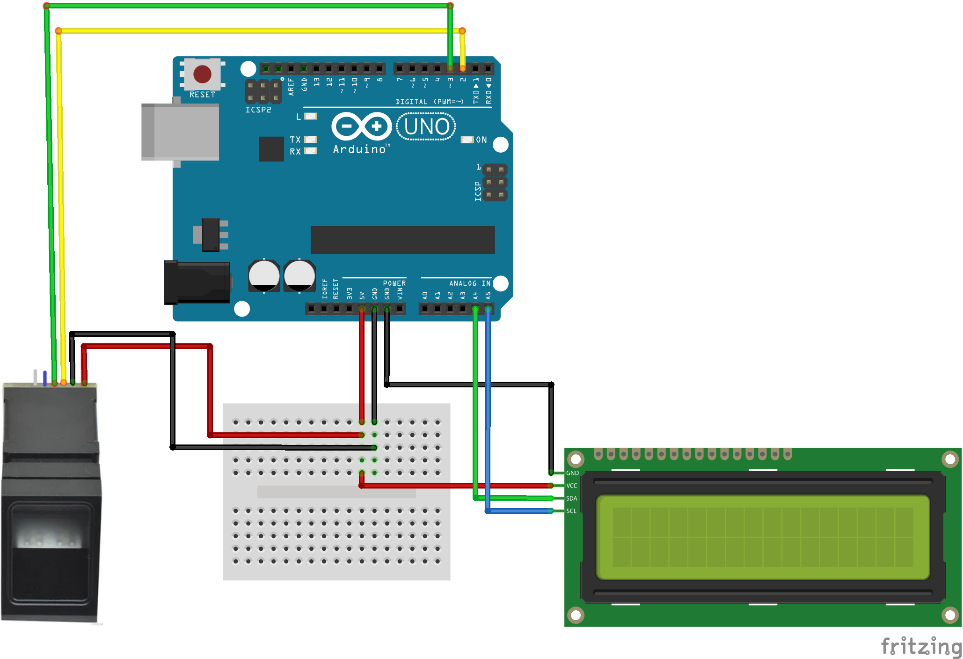
R307 Fingerprint with Arduino Uno
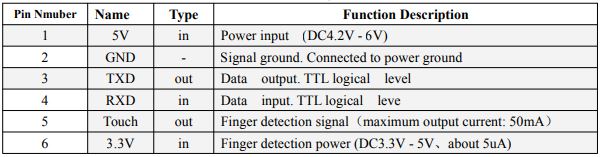
- Red wire VCC ➜5V
- Black wire GND➜GND
- Yellow wire Tx➜2
- Green wire Rx➜3
LCD1602 with Arduino Uno
- GND ➜GND
- VCC➜5V
- SDA➜A4
- SCK➜A5
Software
Arduino IDE
Step 1: Download the Arduino IDE software from the link.
Arduino IDE download link: https://www.arduino.cc/en/software
Step 2: Include two Libraries
Adafruit-Fingerprint-Sensor-Library link: https://github.com/adafruit/Adafruit-Fingerprint-Sensor-Library
LiquidCrystal_I2CLibrary link: https://github.com/johnrickman/LiquidCrystal_I2C
Download .ZIP file of these two libraries and add them like bellow

Coding
Coding part 1: Enrolling Fingerprint
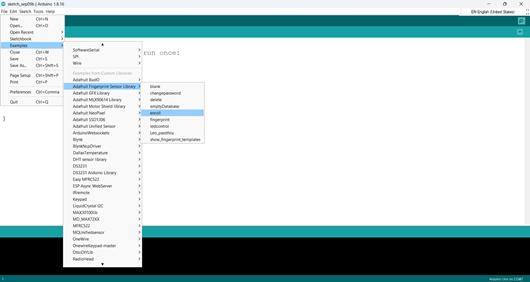
Step 1: Open a new sketch after Installing Arduino IDE.
Step 2: Go to File>Examples> Adafruit-Fingerprint-Sensor>enroll
Step 3: Select the Board and PORT and then run the enroll program. Open Serial monitor after uploading the code.
Step 4: Now enroll the finger prints by entering ID number 1,2,3….so on. When enrolling, user needs to enter the finger two times.
Coding Part 2: Fingerprint matching
Step 1: Open a new sketch. Copy the following code and paste in the sketch.
You can change the name of the person inside the code.
#include <Wire.h>
#include <LiquidCrystal_I2C.h>
LiquidCrystal_I2C lcd(0x27, 20, 4);
#include <Adafruit_Fingerprint.h>
#if (defined(__AVR__) || defined(ESP8266)) && !defined(__AVR_ATmega2560__)
SoftwareSerial mySerial(2, 3);
#else
#define mySerial Serial1
#endif
Adafruit_Fingerprint finger = Adafruit_Fingerprint(&mySerial);
void setup(){
lcd.init();
lcd.backlight();
Serial.begin(9600);
// set the data rate for the sensor serial port
finger.begin(57600);
delay(5);
if (finger.verifyPassword()) {
Serial.println("Found fingerprint sensor!");
} else {
Serial.println("Did not find fingerprint sensor :(");
while (1) { delay(1); }
}
Serial.println(F("Reading sensor parameters"));
finger.getParameters();
Serial.print(F("Status: 0x")); Serial.println(finger.status_reg, HEX);
Serial.print(F("Sys ID: 0x")); Serial.println(finger.system_id, HEX);
Serial.print(F("Capacity: ")); Serial.println(finger.capacity);
Serial.print(F("Security level: ")); Serial.println(finger.security_level);
Serial.print(F("Device address: ")); Serial.println(finger.device_addr, HEX);
Serial.print(F("Packet len: ")); Serial.println(finger.packet_len);
Serial.print(F("Baud rate: ")); Serial.println(finger.baud_rate);
finger.getTemplateCount();
if (finger.templateCount == 0) {
Serial.print("Sensor doesn't contain any fingerprint data. Please run the 'enroll' example.");
}
else {
Serial.println("Waiting for valid finger...");
Serial.print("Sensor contains "); Serial.print(finger.templateCount); Serial.println(" templates");
}
}
void loop() // run over and over again
{
getFingerprintID();
delay(50);
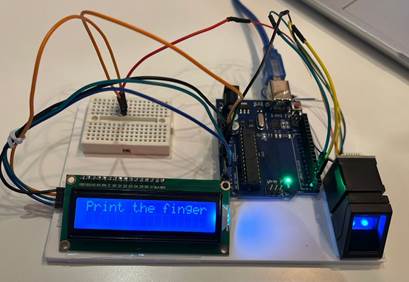
lcd.setCursor(0,0);lcd.print("Print the finger");
}
uint8_t getFingerprintID() {
uint8_t p = finger.getImage();
switch (p) {
case FINGERPRINT_OK:
Serial.println("Image taken");
break;
case FINGERPRINT_NOFINGER:
Serial.println("No finger detected");
return p;
case FINGERPRINT_PACKETRECIEVEERR:
Serial.println("Communication error");
return p;
case FINGERPRINT_IMAGEFAIL:
Serial.println("Imaging error");
return p;
default:
Serial.println("Unknown error");
return p;
}
// OK success!
p = finger.image2Tz();
switch (p) {
case FINGERPRINT_OK:
Serial.println("Image converted");
break;
case FINGERPRINT_IMAGEMESS:
Serial.println("Image too messy");
return p;
case FINGERPRINT_PACKETRECIEVEERR:
Serial.println("Communication error");
return p;
case FINGERPRINT_FEATUREFAIL:
Serial.println("Could not find fingerprint features");
return p;
case FINGERPRINT_INVALIDIMAGE:
Serial.println("Could not find fingerprint features");
return p;
default:
Serial.println("Unknown error");
return p;
}
// OK converted!
p = finger.fingerSearch();
if (p == FINGERPRINT_OK) {
Serial.println("Found a print match!");
} else if (p == FINGERPRINT_PACKETRECIEVEERR) {
Serial.println("Communication error");
return p;
} else if (p == FINGERPRINT_NOTFOUND) {
Serial.println("Did not find a match");
lcd.clear(); lcd.setCursor(0,0);lcd.print("Finger Not match"); delay(1000);
lcd.clear();
return p;
} else {
Serial.println("Unknown error");
return p;
}
Serial.print("Found ID #"); Serial.println(finger.fingerID);
if (finger.fingerID ==1){lcd.clear(); lcd.setCursor(0,0);lcd.print("Hello Mahahe"); delay(1000);
lcd.clear();}
if (finger.fingerID ==2){lcd.clear(); lcd.setCursor(0,0);lcd.print("Hello Mr. X"); delay(1000);
lcd.clear();}
if (finger.fingerID ==3){lcd.clear(); lcd.setCursor(0,0);lcd.print("Hello Mr. Y"); delay(1000);
lcd.clear();}
Serial.print(" with confidence of "); Serial.println(finger.confidence);
return finger.fingerID;
}
// returns -1 if failed, otherwise returns ID #
int getFingerprintIDez() {
uint8_t p = finger.getImage();
if (p != FINGERPRINT_OK) return -1;
p = finger.image2Tz();
if (p != FINGERPRINT_OK) return -1;
p = finger.fingerFastSearch();
if (p != FINGERPRINT_OK) return -1;
// found a match!
Serial.print("Found ID #"); Serial.print(finger.fingerID);
Serial.print(" with confidence of "); Serial.println(finger.confidence);
return finger.fingerID;
}Step 2: Select the Board and PORT and then run the Matching Fingerprint program.
Conclusion
Print the finger you already enrolled; you could see the person’s name belongs the finger on the LCD.